
A sweater sample is where a design becomes something the buyer can inspect and measure. Before bulk production, it lets both sides check the yarn, fit, stitch structure, measurements and finishing details.
Some projects move from the first sample to approval with minor corrections. Others need another round because the yarn, gauge, construction or fit changes. The sampling plan should follow the actual project rather than a fixed number of samples or revisions.
This article explains what buyers should prepare, what each sample stage can confirm, how to review the garment and which decisions commonly slow the custom sweater sampling process.
What the Sampling Stage Actually Decides
Once the buyer approves the required sample, it becomes one of the main references for production. The written specification still matters, but the physical garment helps both sides confirm details that are difficult to judge from drawings alone.
- Material standard: the agreed yarn composition, color and hand feel. The approved yarn and color reference gives both sides a basis for reviewing the materials selected for bulk production.
- Measurement standard: the approved size specs and tolerances that final inspection uses. A measurement change that looks minor on a spec sheet can affect the garment’s balance and fit once worn.
- Workmanship standard: stitch density, linking quality, seam finish and trim placement. During production and inspection, teams may compare workmanship with both the approved sample and the written specification.
- Cost confirmation: after the sample is built, the supplier can review the actual yarn consumption, construction steps and finishing workload. These findings can support final price confirmation.
Any unresolved difference should be recorded before production instructions are finalized.
The Four Sample Types and When You Need Each
A buyer may hear several sample names during development, but they do not all serve the same purpose. The table below shows where each type may fit.
| Sample Type | Typical Stage | Main Purpose | When It May Be Needed |
|---|---|---|---|
| Proto or Development Sample | Early product development | Reviews silhouette, yarn, stitch structure, construction and initial measurements | Commonly used for new product development |
| Fit or Revision Sample | After the buyer reviews the initial sample | Confirms measurement, fit, construction or detail changes | Used when the initial sample requires adjustment |
| Salesman or Photo Sample | Before selling, presentation or marketing activities | Supports photography, showroom presentation or pre-order activity | Optional and project-dependent |
| Pre-Production Sample | Before bulk production when required | Confirms approved materials, trims, labels, measurements and construction | May be requested according to order value, complexity or buyer requirements |
For a new style, the supplier may begin with a development sample and wait for the buyer’s comments before deciding whether another version is needed. A pre-production sample becomes more useful when the order includes approved labels, trims, packaging or other details that need a final physical reference.
 The Sampling Process Step by Step
 The Sampling Process Step by Step
The factory-side workflow — pattern programming, knitting, linking or assembly, washing and finishing — is covered in our sweater sample development guide. Below is the same process from the buyer’s seat, with the key actions at each step.
- Send your design information. Provide reference images or design drawings, measurements or a size chart, material preferences, target quantity, colors, size range, and logo or technique requirements. For example, a reference photo may show an oversized body, but it may not reveal the intended chest measurement, sleeve width or finished garment length. Incomplete information adds time to the technical assessment and quotation.
- Answer the supplier’s technical questions. The supplier may need to confirm gauge, yarn count, color-matching methods and construction details before knitting. Answer these questions before knitting starts. Otherwise, the sample may reflect an assumption rather than the buyer’s intended specification.
- Confirm yarn and color. The buyer reviews color cards, lab dips or yarn swatches for approval. A color that looks correct on one screen may appear different on another. When color accuracy matters, a physical yarn swatch, color card or lab dip gives both sides a clearer reference.
- Develop the proto or initial sample. The factory knits, links or assembles, washes and finishes the garment. Sample development time reflects yarn availability, design complexity, stitch structure and the factory’s current schedule. Buyers should ask for a specific timeline rather than assuming a standard turnaround.
- Review the sample and send consolidated feedback. Work through the checklist in the next section. Send one revision document that identifies the specification version, marks problem areas with photos, and separates required corrections from optional preferences. Measurement comments should refer to agreed measurement points on the spec sheet.
- Revise or approve. A clear understanding of sample fees, revision arrangements and courier costs helps avoid surprises. Straightforward styles with complete starting information tend to need fewer rounds. Complex designs or material changes may call for additional samples.
How to Review Your Sample: A Buyer’s Checklist
 How to Review Your Sample: A Buyer’s Checklist
Work through the sample methodically. Each item below has a practical reason — skip one, and an issue may surface later at a scale that is harder to fix.
- Measurements: measure chest, body length, sleeve length, shoulder and neck opening against the spec sheet. Record any point outside the agreed tolerance.
- Stitch and pattern: look at stitch definition and tension evenness. Cable, jacquard or rib structures should match the design reference in scale and clarity.
- Hand feel and weight: compare against the expected reference. Weigh the garment on a scale if yarn weight affects your costing.
- Color: review under daylight and indoor lighting conditions. A monitor alone is not enough.
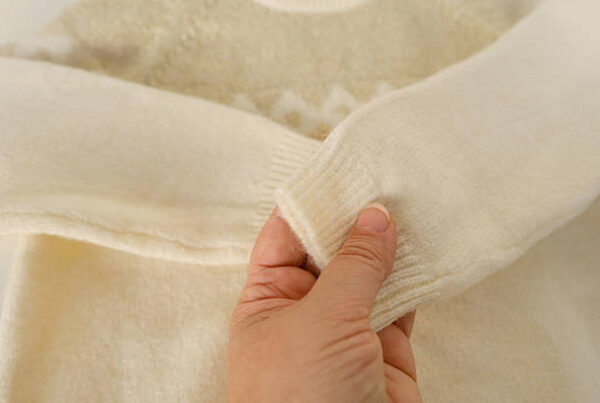
- Seams and finishing: check linking lines on shoulders and armholes. Note how the rib recovers at the cuff and hem. Look for loose yarn ends.
- Trims and details: test buttons, zippers and drawcords. Compare label and embroidery placement against the original design reference.
- Fit: try the sample on a fit model or dress form. Pay attention to shoulder angle and armhole movement.
- Wash behavior: when wash testing is part of the project, evaluate using the care method and testing requirements agreed with the supplier.
Group feedback by garment area — body, sleeves, neckline, trims. Attach photos with the affected spots marked. One consolidated document gives the supplier a single clear reference for the next version.
What Usually Delays Sampling — and How to Avoid It
Several recurring issues can slow the sampling process. Below are the common causes and the steps that tend to reduce them.
- Incomplete design information. Send everything in one package at the start. If a full tech pack is not available, our guide on producing a sweater from a photo explains how additional detail supports the sampling process.
- Slow color approval. Review color cards or lab dips promptly, but give yourself enough time to make a decision you will not second-guess later.
- Fragmented feedback. Review the whole sample first, then send one consolidated revision list tied to a single specification version.
- Design changes during sampling. Try to lock the main yarn, gauge, measurements and construction before knitting. A buyer may approve the shape first and then change the yarn count. That change can affect the gauge, weight and measurements, so the supplier may need to develop another sample.
- Unclear sample terms. Confirm the sample fee, revision policy and courier cost before the first sample, not after.
Delay at the sampling stage affects production scheduling. Bulk production usually begins after the buyer approves the required sample and confirms the order. Working toward a fixed delivery date? Build the timeline backward from that target — our sweater production lead time guide covers how sampling fits into the full schedule.
Frequently Asked Questions
How long does custom sweater sampling take?
There is no single timeline for every sweater. Yarn availability, stitch complexity, finishing, buyer feedback and revision needs all affect the schedule. Ask the supplier to separate material preparation, sample development, review, revision and courier delivery in the project timeline.
How much does a custom sweater sample cost?
Sample fees reflect the yarn, design complexity, stitch structure, any custom dyeing, trims, handwork and the total number of samples. Ask for a breakdown before development starts, and confirm whether the supplier offers any revision or refund terms.
How many revision rounds are normal?
A straightforward style may need only minor corrections. Complex cables, jacquard, intarsia, fit adjustments or material changes can lead to additional samples. One consolidated feedback document usually makes the next round easier to follow.
Can I change the yarn or color after the first sample?
A color change may require new lab dips, yarn swatches or another color approval step. Changing the yarn, yarn count or gauge can shift measurements, structure, weight and hand feel, so the supplier may need a fresh development sample. Where possible, confirm these choices before knitting begins.
What should I send the factory to start sampling?
At minimum: reference images or design drawings, measurements or a size chart, material preference, quantity by color and size, size range, logo or technique requirements, label and packaging requirements, and the target delivery schedule. A complete sweater quote information checklist covers the full list and doubles as sampling input. Include testing requirements when applicable.
Do I need a tech pack to start the sampling process?
A tech pack helps, but buyers can begin with reference images, a physical sample, measurement chart or detailed design notes. Accurate sampling and quotation still need clear measurements, yarn, color, construction, quantity and branding information — the supplier needs enough to build from.
Start Your Sampling with the Right Information
Send HDL Fashion your sampling information with reference images, physical samples, measurement charts or tech packs for an initial assessment. Include the material preference, quantity by color and size, logo, labels, packaging requirements and target delivery schedule where available. HDL Fashion can then review the project requirements and discuss the applicable sampling process, timeline and quotation.