
A sweater sample may not look exactly like the original design drawing. Some differences come from translating a flat visual into knitted fabric, while others may indicate that the sample does not follow the approved specification. The key is to separate expected translation effects from issues that need correction before approval.
 Why a 2D Design and a Knitted Sample Do Not Match Exactly
 Why a 2D Design and a Knitted Sample Do Not Match Exactly
A design drawing, CAD file or AI-generated render is a flat image. A sweater is a three-dimensional object made of interlocking loops of yarn that stretch, drape and reflect light. The drawing does not show stitch texture, yarn thickness, fabric movement or how the garment sits on a body, so some visual distance between the two is expected.
Three common sources of the gap are stitch resolution, color and yarn appearance, and changes in proportion when a flat drawing becomes a knitted garment. Each can be managed, but only if the factory knows which part of your design matters most.
Common mistakes include sending a low-resolution image with no notes and expecting fine details in a chunky knit. Another mistake is treating an AI render as a physically achievable specification. If you only have a photo or render, the factory must interpret missing technical details. Read how a factory works from a visual reference before you commit to a sample.
Gauge and Stitch Resolution: What Detail the Knit Can Actually Hold
Machine gauge influences stitch resolution, but gauge alone does not determine whether a detail can be reproduced. Yarn count, stitch density, motif size, knitting structure and machine setup also matter. Finer gauges can support smaller stitch units, while chunkier constructions often require artwork to be larger or simpler.
If the artwork is too fine, first consider resizing or simplifying it. You can also review the gauge and yarn. If needed, evaluate embroidery, patch/appliqué or another suitable knitted colorwork structure with the manufacturer. These changes can alter the look, which is why the first sample may feel “wrong” to a buyer who has not seen the design translated into stitches.
| Design element in the drawing | How it typically appears in the knit |
|---|---|
| Thin lines, small text or fine logo detail | May blur or lose definition, especially at chunky gauges; may need enlargement, simplification or another suitable technique depending on the artwork and construction |
| Sharp, high-contrast edges between colors | Soften into a stepped or dotted edge depending on gauge and colorwork technique |
| Flat, uniform color fill | Shows stitch texture and light variation across the surface |
| Smooth gradients and soft shadows | In knitted colorwork, smooth digital gradients generally need to become discrete color or stitch transitions. Consider another surface technique when a continuous gradient effect is essential. |
| Full-width pattern covering the whole garment | May be interrupted at seams, armholes or rib transitions; placement and seam matching need to be engineered at the panel-development stage |
Gauge also shapes weight, hand feel and cost, so it is worth deciding your gauge before you lock the design detail.
Color and Yarn: Why On-Screen Colors Do Not Reproduce One-to-One
A screen emits light to create color; yarn reflects light. For that reason, an on-screen color should not be expected to match dyed yarn exactly without a physical reference and agreed viewing conditions. Fabric structure, yarn finish and light source all shift how the same color reads in a finished sweater.
This is why the sample-to-drawing color gap is handled through a separate approval step rather than assumed away. Depending on the yarn source and project, color may be reviewed through yarn color cards, lab dips, physical yarn samples or knitdown swatches. Once a physical reference is approved, it can be used as the comparison point for later samples, together with any agreed color tolerance or shade range.
If color is the part of your design you care about most, state it clearly and provide a Pantone reference or a physical color target where possible. The process for locking color before bulk is covered in more detail in our color approval guide.
Proportion, Placement and Fit: From Flat Drawing to Worn Garment
A flat sketch shows a garment laid out with no body inside it. Once knit and worn, the same garment stretches around the chest, shoulders and arms, which changes how the collar, armhole and motif sit. A logo that looks centered on a flat sketch can land too high or too low once the sweater is on a person.
Fit is also a variable the drawing cannot capture. Gauge, yarn, construction and size can all change how the same design hangs. Even a faithful flat sketch may look wrong if the base measurements or grading are unclear.
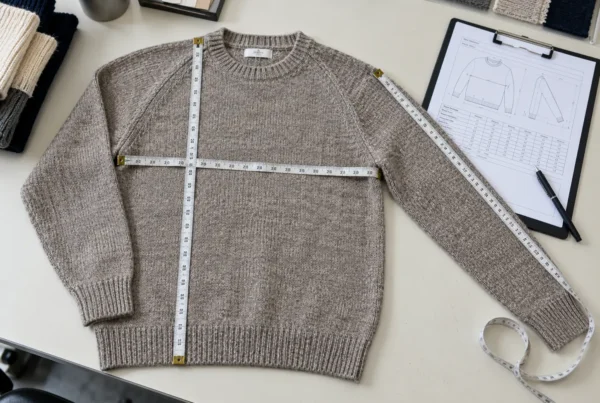
The practical fix is to anchor the sample in a real measurement spec and a clear size range, not in the sketch alone. A technical package that fixes points of measure, tolerances and placement reduces avoidable guesswork during sample development.
How the Factory Bridges the Gap Before You Approve Bulk
During technical review, the manufacturer should identify which parts can be reproduced as drawn. The team should also flag areas that may need adjustment before knitting the first sample. In practice the handoff works through a few structured steps:
- Design review. The factory reads the drawing against the chosen yarn, gauge and construction and lists any detail that cannot be reproduced as drawn.
- Knitdown swatch or test panel. Depending on the project, the factory may use a knitdown swatch or test panel before the full garment. It helps review stitch texture, motif resolution, yarn behavior and color.
- First sample. The garment is knitted and finished, then checked against the agreed specification. Depending on the project, the factory may provide review photos before the physical sample is shipped.
- Feedback loop. Your comments are grouped into changes that can be made in the next sample versus those that would require a different yarn, gauge or technique.
Each round should move the sample closer to an agreed interpretation of the design, not chase an impossible copy of the image. The development sample and pre-production sample serve different approval purposes, and knowing what to sign off at each stage prevents later surprises.
 What to Send and Confirm to Reduce the Gap
 What to Send and Confirm to Reduce the Gap
Much of the avoidable gap between the drawing and the first sample can be reduced before knitting starts. The more of the following you provide, the closer the first sample will land:
- Highest-resolution artwork available, plus any vector file for logos and motifs
- A clear note on which design elements are fixed and which can be simplified or resized
- Your target gauge, yarn composition/count, or a reference yarn where available
- Physical color references or Pantone numbers for every color in the design
- A measurement spec or at least a base size and size range
- Reference photos of a similar garment showing the drape and fit you want
When the first sample arrives, review it against this same list rather than against the image alone. The approval checklist we use for samples gives you a structured way to decide what to accept, what to correct and what to ask the factory about.
Frequently Asked Questions
Why does a sample look different from the drawing even when exact measurements were provided?
Measurements fix the size and shape, but they do not control stitch texture, yarn behavior, color reproduction or how the garment drapes on a body. Those differences come from the knit itself, which is why a sample can match every measurement and still look different from a flat image.
Can a factory reproduce an AI-generated design image exactly?
An AI-generated image should not be treated as an exact production specification. A manufacturer may reproduce the overall design intent, but stitch structure, proportions, color and construction still need to be translated into manufacturable specifications.
Should a buyer approve a sample that does not match the drawing?
A sample should be approved only when the finished result meets the agreed specification and the buyer accepts the necessary design-to-knit translation. Differences caused by stitch texture or yarn behavior are not automatically acceptable if they change an important design requirement. Shape, placement, measurements, color and construction should be checked against the approved references before sign-off.
What details may lose definition at a chunky gauge?
Small text, thin lines and closely spaced color areas may lose definition in chunkier constructions. Artwork can be enlarged or simplified, or another decoration or construction method can be evaluated with the manufacturer according to the design.
How can a buyer get the next sample closer to the original design?
Send specific, grouped feedback tied to the original reference. State what to keep, enlarge or recolor, and provide missing inputs such as color targets or a target gauge. Avoid vague comments like “make it look like the picture,” which give the factory nothing to act on.
Is a physical sample needed to get an accurate match?
A physical reference is useful when the target look depends on drape, hand feel or a specific stitch texture. These qualities are difficult to describe in a drawing. If you have one, send it; if not, reference photos and a clear spec are a workable starting point.
Get a Sample That Matches Your Intent
If your drawing is not translating the way you expected, send us the artwork, your target gauge and yarn, color references, and the size range you need. Our team can review the artwork against the proposed yarn, gauge and construction, identify areas that may need adjustment, and discuss a suitable development approach before the first sample is knitted.